警告
本文最后更新于 2023-10-22,文中内容可能已过时。
使用 rsync 从 Windows 到 Linux 进行同步
简介
rsync 的官网:https://rsync.samba.org/
参考博客:使用 Rsync 从 Windows 同步数据到 Linux - 来份锅包肉 - 博客园
rsync命令原生支持的是 Linux 操作系统之间的相互同步,但是在实际的开发过程中,我们一般都是在 Windows 系统下开发,在 Linux 系统下部署,此时,我们就需要使用 rsync 从 Windows 到 Linux 进行同步。此篇文章,我们主要针对 Windows 作为客户端 Linux 作为服务端的同步。
具体使用场景有《IDEA 远程调试.docx》
关于其他场景的实践,请看《rsync 命令》
Linux 端的配置
- 安装 rsync
1
2
3
4
5
|
# 检查是否安装了 rsync
rpm -qa|grep rsync

# 如果没有安装的话,进行安装
yum install rsync
|
输入rsync --version,输出类似下文这样的版本信息,则表示客户端安装成功。
 1
 2
 3
 4
 5
 6
 7
 8
 9
10
11
12
|
$ rsync --version
rsync  version 3.1.2  protocol version 31
Copyright (C) 1996-2015 by Andrew Tridgell, Wayne Davison, and others.
Web site: http://rsync.samba.org/
Capabilities:
    64-bit files, 64-bit inums, 64-bit timestamps, 64-bit long ints,
    socketpairs, hardlinks, symlinks, IPv6, batchfiles, inplace,
    append, ACLs, xattrs, iconv, symtimes, prealloc

rsync comes with ABSOLUTELY NO WARRANTY.  This is free software, and you
are welcome to redistribute it under certain conditions.  See the GNU
General Public Licence for details.
|
- 编写配置文件
rsync 涉及到的配置主要有三个:
/etc/rsyncd.conf -> 对 rsync 服务进行配置/tmp/rsync -> 待同步的目标目录,可以根据实际情况自定义为别的路径/etc/rsyncd.passwd ->里面包含用于进行密码验证的账号信息
先看看/etc/rsyncd.conf的配置,默认的配置如下
 1
 2
 3
 4
 5
 6
 7
 8
 9
10
11
12
13
14
15
16
17
18
19
20
21
22
|
# See rsyncd.conf man page for more options.

# configuration example:

# 这里是一些整体性的配置
# uid = nobody
# gid = nobody
# use chroot = yes
# max connections = 4
# pid file = /var/run/rsyncd.pid
# exclude = lost+found/
# transfer logging = yes
# timeout = 900
# ignore nonreadable = yes
# dont compress   = *.gz *.tgz *.zip *.z *.Z *.rpm *.deb *.bz2


# 从这里往下是针对各个同步目录的独特配置,ftp 就是这个同步目录的逻辑名称,我们在客户端通过 rsync 往服务端同步的时候,也需要指定逻辑名称
# [ftp]
#        path = /home/ftp
#        comment = ftp export area
#
|
下面是具体的例子,注意,rsync 进行通信的端口默认为 873,一般建议改成别的端口,比如 8730,同时需要在 firewall 中配置对应的端口可通过。
 1
 2
 3
 4
 5
 6
 7
 8
 9
10
11
12
13
14
15
16
17
18
19
20
21
22
23
24
25
26
27
28
29
30
31
32
33
34
|
# /etc/rsyncd: configuration file for rsync daemon mode

# See rsyncd.conf man page for more options.

# 进行通信的端口,如果 firewall 打开的话,需要将对应的端口添加进去
# 默认端口是 873 ,这里为了防止泄露,使用 8730
port=8730
# 日志文件
log file=/var/log/rsync.log
# rsync 的进程 id
pid file=/var/run/rsync.pid

# 要同步的模块,这里一般以项目名命名
[test]
# 同步的目标文件夹
path=/tmp/rsync
# rsync daemon 在传输前是否切换到指定的 path 目录下,并将其监禁在内,用于增加传输的安全性
use chroot=no
# 指定最大的连接数
max connections=4
# yes 表示只读本地文件无法同步到服务器
read only=no
# 客户端请求显示模块列表时,该模块是否显示出来
list=true
# 服务运行时的用户
uid=root
# 服务运行时的用户组
gid=root
# 进行验证时的用户名,必须是系统存在的用户
auth users = root
# 连接用户时的密码
secrets file=/etc/rsyncd.passwd
# 允许的 ip
hosts allow=*
|
创建/etc/rsyncd.conf中test模块中的path配置中设置的文件夹,这是同步的文件目标路径。
创建/etc/rsyncd.conf中test模块中的secrets file配置中设置的密码文件,并写入密码,密码文件的格式很简单,一行一个用户名密码,用户名和密码用:隔开。
注意,这个密码不是 Linux 系统的登录密码,而是在服务端设置的,客户端往这个模块同步文件的时候,需要填写的密码。
配置密码可以防止任意用于同步任意文件到服务端。注意,下文中的密码设置为123456是为了演示方便,实际使用的时候,一定要更换成高强度的密码。
1
2
3
4
5
6
7
8
|
# 创建文件夹
vim /etc/rsyncd.passwd

# 写入密码
echo "root:123456" > /etc/rsyncd.passwd

#更改文件权限
chmod 600 /etc/rsyncd.passwd
|
- 启动 rsync,等待客户端的连接
1
2
3
|
# 将 rsync 设置成开启自启,并启动
systemctl enable rsyncd
systemctl start rsyncd
|
Windows 端的配置
安装 cwRsync
首先我们要注意,rsync 没有提供 Windows 客户端,我们需要下载第三方客户端 cwRsync。
打开cwRsync - Rsync for Windows | itefix.net,

选择 Free Rsync Client,并选择 download。
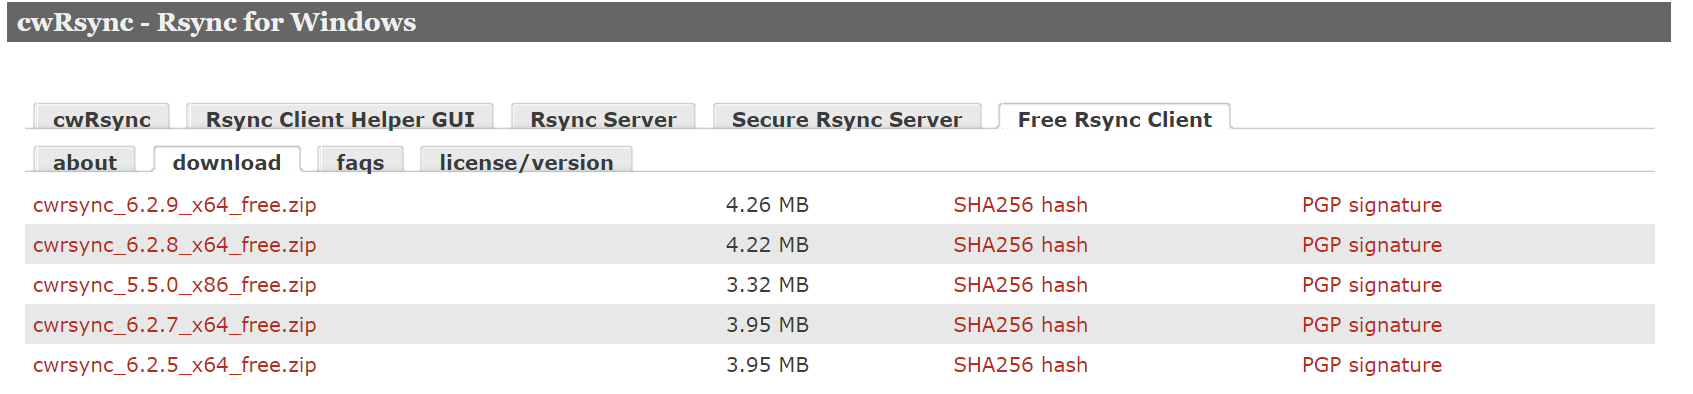
然后下载对应的版本即可,
将下载下的的 zip 包解压到目标路径,然后将解压结果的 bin 目录添加到 Path 环境变量,
我下载的是cwrsync_6.2.9_x64_free.zip。解压到D:\cwRsync目录,所以最终是将D:\cwRsync\cwrsync_6.2.9_x64_free\bin添加到 Path 环境变量中。
然后在 CMD 或者 PowerShell 中输入rsync --version,输出类似下文这样的版本信息,则表示客户端安装成功。
 1
 2
 3
 4
 5
 6
 7
 8
 9
10
11
12
13
14
15
16
17
18
19
20
|
rsync  version 3.2.7  protocol version 31
Copyright (C) 1996-2022 by Andrew Tridgell, Wayne Davison, and others.
Web site: https://rsync.samba.org/
Capabilities:
    64-bit files, 64-bit inums, 64-bit timestamps, 64-bit long ints,
    socketpairs, symlinks, symtimes, hardlinks, no hardlink-specials,
    hardlink-symlinks, IPv6, atimes, batchfiles, inplace, append, no ACLs,
    no xattrs, optional secluded-args, iconv, prealloc, stop-at, crtimes
Optimizations:
    no SIMD-roll, no asm-roll, openssl-crypto, no asm-MD5
Checksum list:
    xxh128 xxh3 xxh64 (xxhash) md5 md4 sha1 none
Compress list:
    zstd lz4 zlibx zlib none
Daemon auth list:
    sha512 sha256 sha1 md5 md4

rsync comes with ABSOLUTELY NO WARRANTY.  This is free software, and you
are welcome to redistribute it under certain conditions.  See the GNU
General Public Licence for details.
|
回顾我们安装的服务端版本,我们会发现 rsync procotol 的版本是一致的
准备 rsync 的同步配置文件
-
登录密码文件:我们在配置服务端的时候,在/etc/rsyncd.conf中每一个模块配置中的secrets file配置中都设置的密码文件,现在如果我们想往这个模块对应的同步目录中同步文件,就需要填写服务端配置的密码。
我们只需要将密码填写到文件中,然后在调用rsync命令同步的时候通过--password-file配置指定此文件即可,用户名会额外在同步目标路径中显式指定。
当然在调用rsync命令同步的时候也可以不指定密码文件,那么rsync命令就会要求你手动输入密码。
这里我们可以创建D:\cwRsync\password.txt,内容为123456,对应服务器端配置的/etc/rsyncd.passwd文件中的密码,实际使用的时候,一定要更换成高强度的密码。
-
同步过程中排除的文件:我们在同步过程中,可能并不想把一些本地文件同步到服务端,我们可以把这些文件或者文件夹名称集中到一个文件中,在通过rsync命令同步的时候通过--exclude-from配置指定此文件即可。
而且此文件还支持?、*等通配符,这里我们可以创建D:\cwRsync\exclude.txt,文件内容如下:
1
2
3
4
|
.idea
11.txt
??a.txt
log_*
|
开始同步
1
|
rsync -avPz --port 8730 --password-file=/cygdrive/D/cwRsync/password.txt --exclude-from=/cygdrive/D/cwRsync/exclude.txt /cygdrive/D/cwRsync/test root@xiashuo.xyz::test/
|
其余参数请看《rsync 命令》
此外,还有一点需要注意,在 Windows 系统下使用 cwRsync,在指定文件夹路径时,在真实目录前添加/cygdrive/即可,比如D:\cwRsync可用/cygdrive/D/cwRsync表示。
最后,在表示rsync目标路径的时候,格式为username@host::targetmodule,意识是指定服务器中的指定模块对应的路径,同时username需要跟/etc/rsyncd.conf中targetmodule模块配置中auth users配置对应上,同时,--password-file配置中配置的密码,需要跟/etc/rsyncd.conf中targetmodule模块配置中 的secrets file配置文件中的密码对的上。
简单实践
D:\cwRsync\test路径下有这些文件
 1
 2
 3
 4
 5
 6
 7
 8
 9
10
11
12
13
|
PS D:\cwRsync\test> ls

    Directory: D:\cwRsync\test

Mode                 LastWriteTime         Length Name
----                 -------------         ------ ----
d----            2023/9/4    19:41                .idea
-a---            2023/9/4    19:41              0 11.txt
-a---            2023/9/4    16:58             49 aaaaa.txt
-a---            2023/9/4    19:42              0 b2a.txt
-a---            2023/9/4    16:57             24 bbbb.txt
-a---            2023/9/4    19:43              0 ccc.txt
-a---            2023/9/4    19:42              0 log_2023年9月4日.txt
|
执行
1
|
rsync -avPz --port 8730 --password-file=/cygdrive/D/cwRsync/password.txt --exclude-from=/cygdrive/D/cwRsync/exclude.txt /cygdrive/D/cwRsync/test root@xiashuo.xyz::test/
|
在 rsync 服务端的/tmp/rsync/test
1
2
3
4
5
6
7
|
$ pwd
/tmp/rsync/test
$ ll
total 8
-rwxrwx--- 1 197609 197609 49 Sep  4 16:58 aaaaa.txt
-rwxrwx--- 1 197609 197609 24 Sep  4 16:57 bbbb.txt
-rwxrwx--- 1 197609 197609  0 Sep  4 19:43 ccc.txt
|
可见.idea文件夹还有很多被排出的文件都没有同步到服务器中。
当我们添加了了其他文件或者修改了已存在的文件后,我们需要再执行一次rsync命令。
即rsync命令的作用是执行一次同步一次,而不是执行一次就建立了自动同步,所以需要我们在想要同步的时候手动同步,当然我们也可以执行一个定时任务来同步。

 小虾米
小虾米